If you have caught my original nesting post, three weeks ago, then you know that our family is currently preparing for the arrival of baby #4. We are expecting a little girl in just about eight weeks! Eek! To get ready for baby, I have been doing some weekly crafting on her behalf. All of the projects we are putting to use for baby, but I’ll be honest and let you in on a little secret. These projects are helping me pass the time as I wait for our little girl. Pregnancy is long…especially when we’re in the stretch of winter that feels like it lasts forever, anyway.
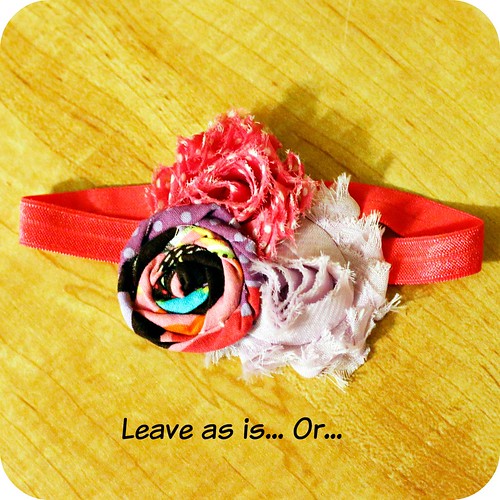
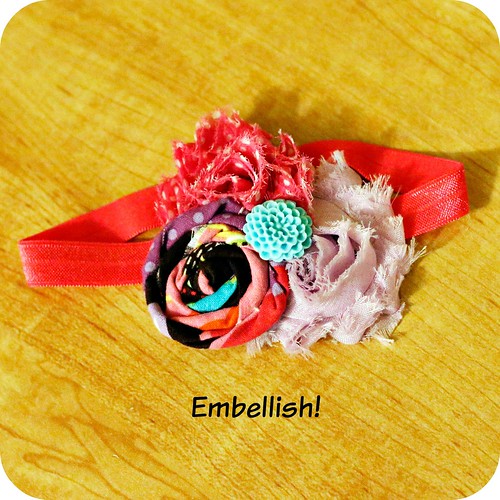
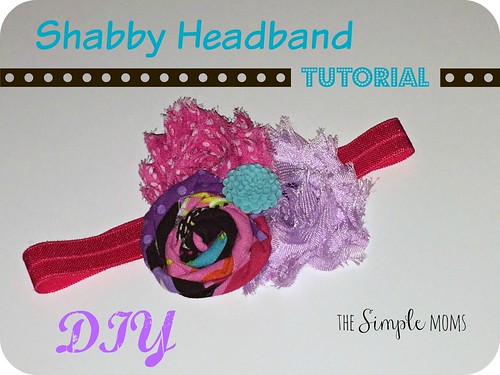
Today, I will be sharing with you how to make some adorable baby headbands! These are super cute, and are quick to whip up for your little princess or for a baby shower gift. The headband in the photos took me about 15 minutes from start to finish, and it was easy peasy. I had all of the components in my craft supply stash, but you can find plenty of adorable flowers and embellishments at your local craft store. Most places now carry ready-made elastic headbands in both newborn and child sizes, but you can also make your own by simply gluing or sewing a length of elastic. If you caught my minky baby blanket tutorial from last week, you may recognize the fabric from that. I had about a 1″ wide scrap of the fabric from the blanket, and thought I’d make a matching headband for the hospital. Gotta love coordination!
Let’s get started!
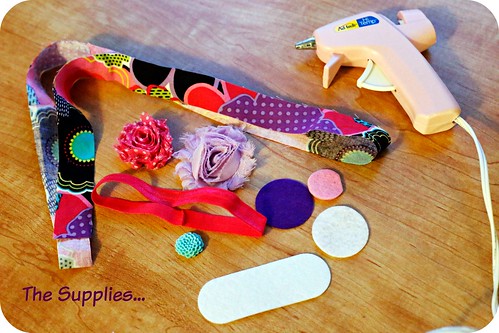 The supplies…
- glue gun and hot glue sticks
- elastic headband
- felt circles
- fabric scrap
- shabby flowers
- button, resin piece, rhinestone, etc.
The details…
Start by making your rolled fabric flower. Use about a 1″ wide scrap of fabric. The length of your fabric will depend on how big you want your finished flower to be. Start with a longer strip, and you can trim it when you are satisfied with the size of your flower.
- Tie a knot in one end of your fabric scrap.
- Hot glue to the center of a felt circle. I like to use a 1.5″ felt circle, as they create a flower that isn’t too small or too big for most headbands, including a newborn size.
- Fold your fabric inward, and begin to twist and glue. It works best to glue small sections at a time so it doesn’t set too fast…and if you’re like me, and a bit clumsy, you’ll burn your fingers in the hot glue a little less this way.
- When your flower is the size you like, trim the fabric strip, tuck it behind the felt piece, and secure with hot glue.
When assembling your headband, keep in mind the age of the child who will be wearing it. If it’s for a newborn, choose smaller components, so it doesn’t overwhelm the baby’s face.
- Before gluing your pieces together, stack them up to get an idea of the best layout for your headband. If you are using shabby flowers, they generally have a spot on them that looks kind of unfinished. Arrange your pieces so these rough edges are hidden under one another. You will have a much more polished looking headband.
- When you are happy with your arrangement, begin to glue your flowers together, one at a time.
- Flip your arrangement over, and glue your headband to it. You want to glue the seam of your headband to the back of your arrangement, as it will reinforce and hide the seam.
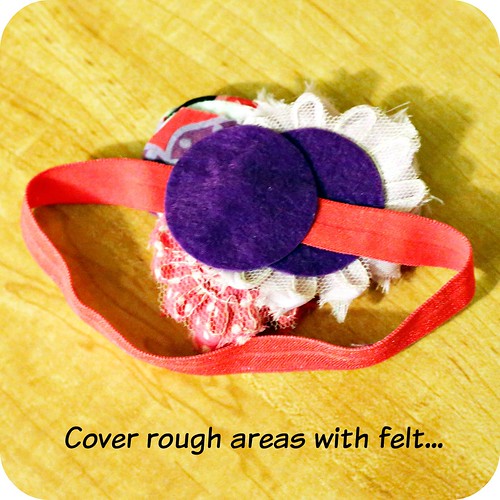
- Cover the headband and anything that could be scratchy on the back of your arrangement with felt pieces. This gives your headband a finished look, and more importantly, soft felt protects sensitive baby heads from scratches.
- Finish your headband with embellishments if you like, or leave it as is. If you are using small embellishments, be extra cautious when your baby is wearing the headband. Older babies who tend to put things in their mouth, could potentially choke on buttons, rhinestones, etc.
- Finally, find a sweet little babe to adorn with your pretty headband! Or, wrap it up and gift it to a new mom-to-be!
Does your little one wear headbands? Some babies don’t mind them, and some won’t tolerate them. If you have tips on how to keep those adorable headbands on tiny heads, please let me know! I’d love for my new daughter to wear headbands without a fuss!


